Your first funnel in 10 minutes
From an empty account to a published funnel, step by step.
1 min read · updated 1 October 2026
This guide takes you from zero to a live funnel. You'll need one product and a connected Stripe account.
1. Pick a template
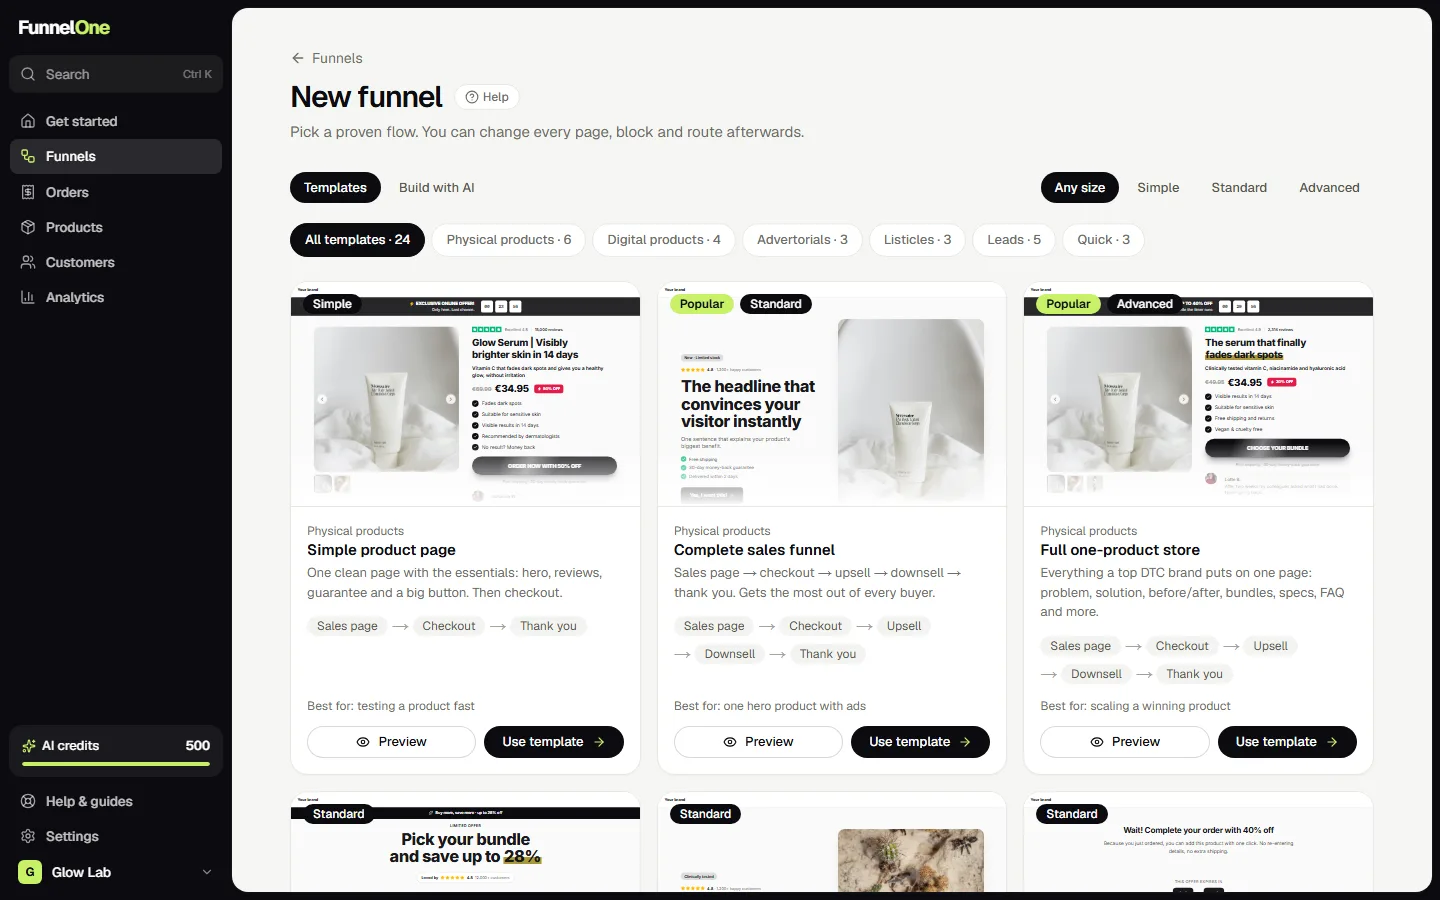
Go to Funnels → New funnel. You'll see all templates, grouped by category (physical products, digital products, advertorials, listicles, leads) and by size (simple, standard, advanced).
Press Preview to click through every page of a template, or Use template to create the funnel right away. If your store has exactly one product, it's linked to the checkout automatically.
2. Check the flow
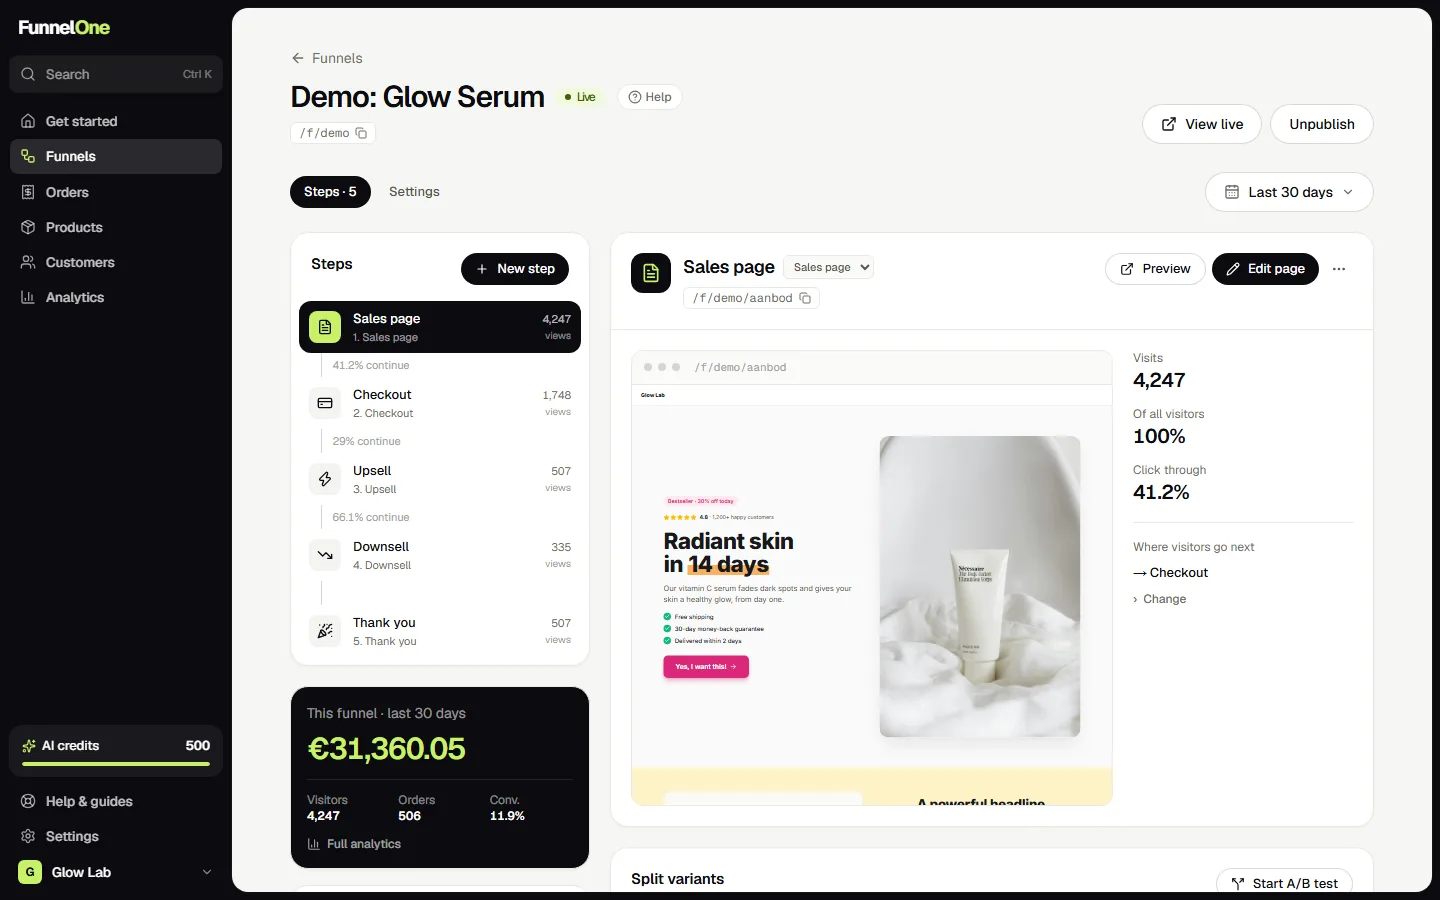
You land on the funnel page. On the left you see the steps in order and how many visitors reach each one. Click a step to see its preview, numbers and where visitors go next.
3. Edit the pages
Press Edit page. Click any text on the page and type. Swap images in the panel on the right. Add blocks from Add on the left, by clicking or dragging them onto the page. Press Save (or Ctrl+S) when you're done.
4. Link your product
Open the checkout step in the editor and go to Step on the left. Pick the product, and optionally an offer price, bundles and an order bump.
5. Preview and publish
Use Preview to see the funnel exactly as a shopper will. Everything looks good? Press Publish on the funnel page. The funnel is now live on its address, which you can copy with one click.
Was this guide helpful?
Try it in your own store
Free for 14 days. Every feature, no credit card.